Configure MCP Server
You can add desired MCP servers directly from the marketplace or add them manually.Method 1: Add from the Marketplace
The MCP marketplace offers popular MCP servers from the community that you can add to your project:- At the top right of the side chat box, click the Settings icon
- Select MCP from the menu
- The MCP tab appears
- Click the + Add MCP Servers button, or click the + Add button and select Add from Marketplace from the menu
- This directs you to the MCP marketplace
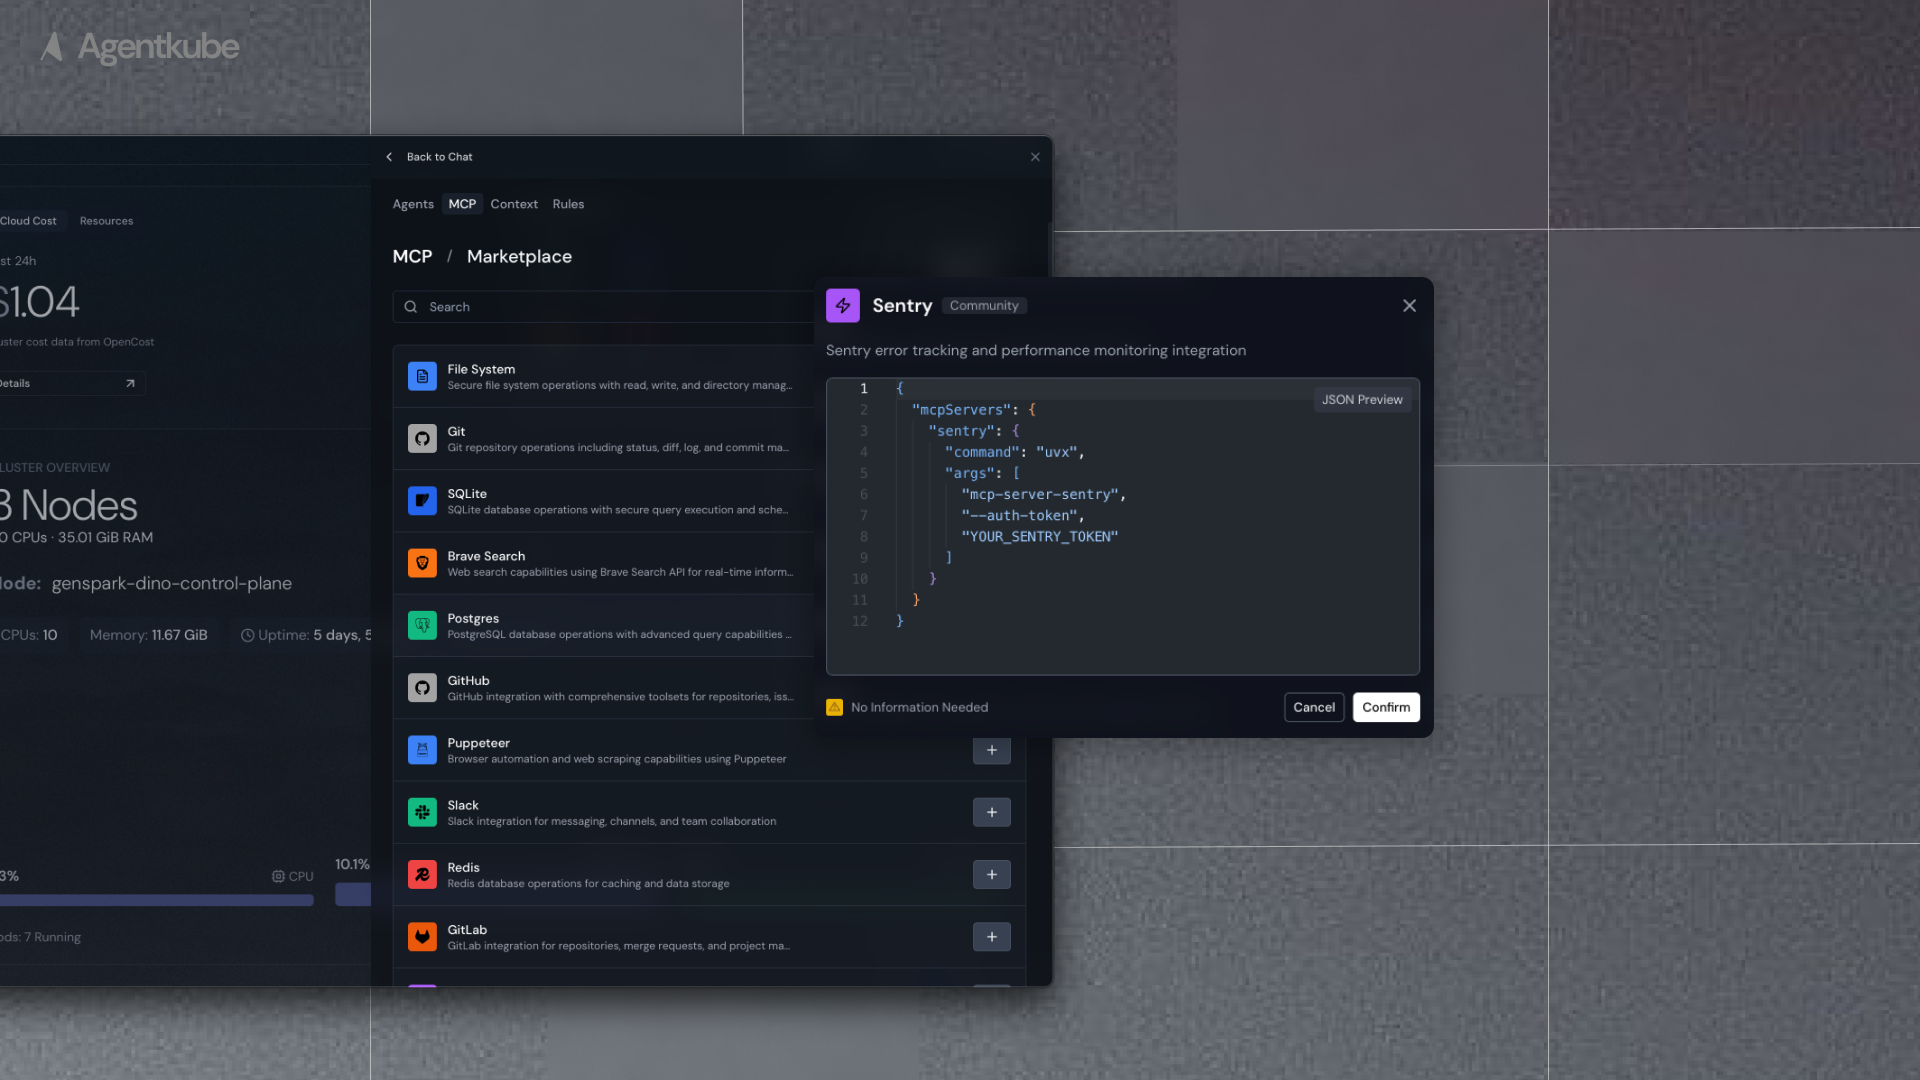
- Find your desired MCP server
- Click the + button at the right
- In the pop-up window, fill the JSON configuration information for that MCP server
For MCP servers marked as “Local”, NPX or UVX needs to be installed locally before they can be used.
- Replace the env information (such as API key, token, and access key) with the real information
- Click the Confirm button
Method 2: Add Manually
If you do not find desired MCP servers in the marketplace or you want to use MCP servers developed by yourself, you can add them manually:- At the top right of the side chat box, click the Settings icon
- Select MCP from the menu
- The MCP tab appears
- Click the + Add button and select Add Manually from the menu
- The Configure Manually window appears
- Fill in the JSON configuration information for that MCP server
Preferably use NPX or UVX configuration.
Adding New MCP Server
- Enter the JSON configuration into the input box
- Click the Confirm button
- The MCP Server will be added to the MCP server list